Printing a Document Using a Pin (Secure Print) *Windows
By setting a PIN to a document when printing from a computer, the document is held in the memory of the machine, and is not printed until the correct PIN is entered on the operation panel of the machine. This function is called "Secure Print," and the document that is protected by a PIN is called a "secured document." Using Secure Print keeps printouts of confidential documents from being left unattended. Before you can use this function, you need to complete some procedures.
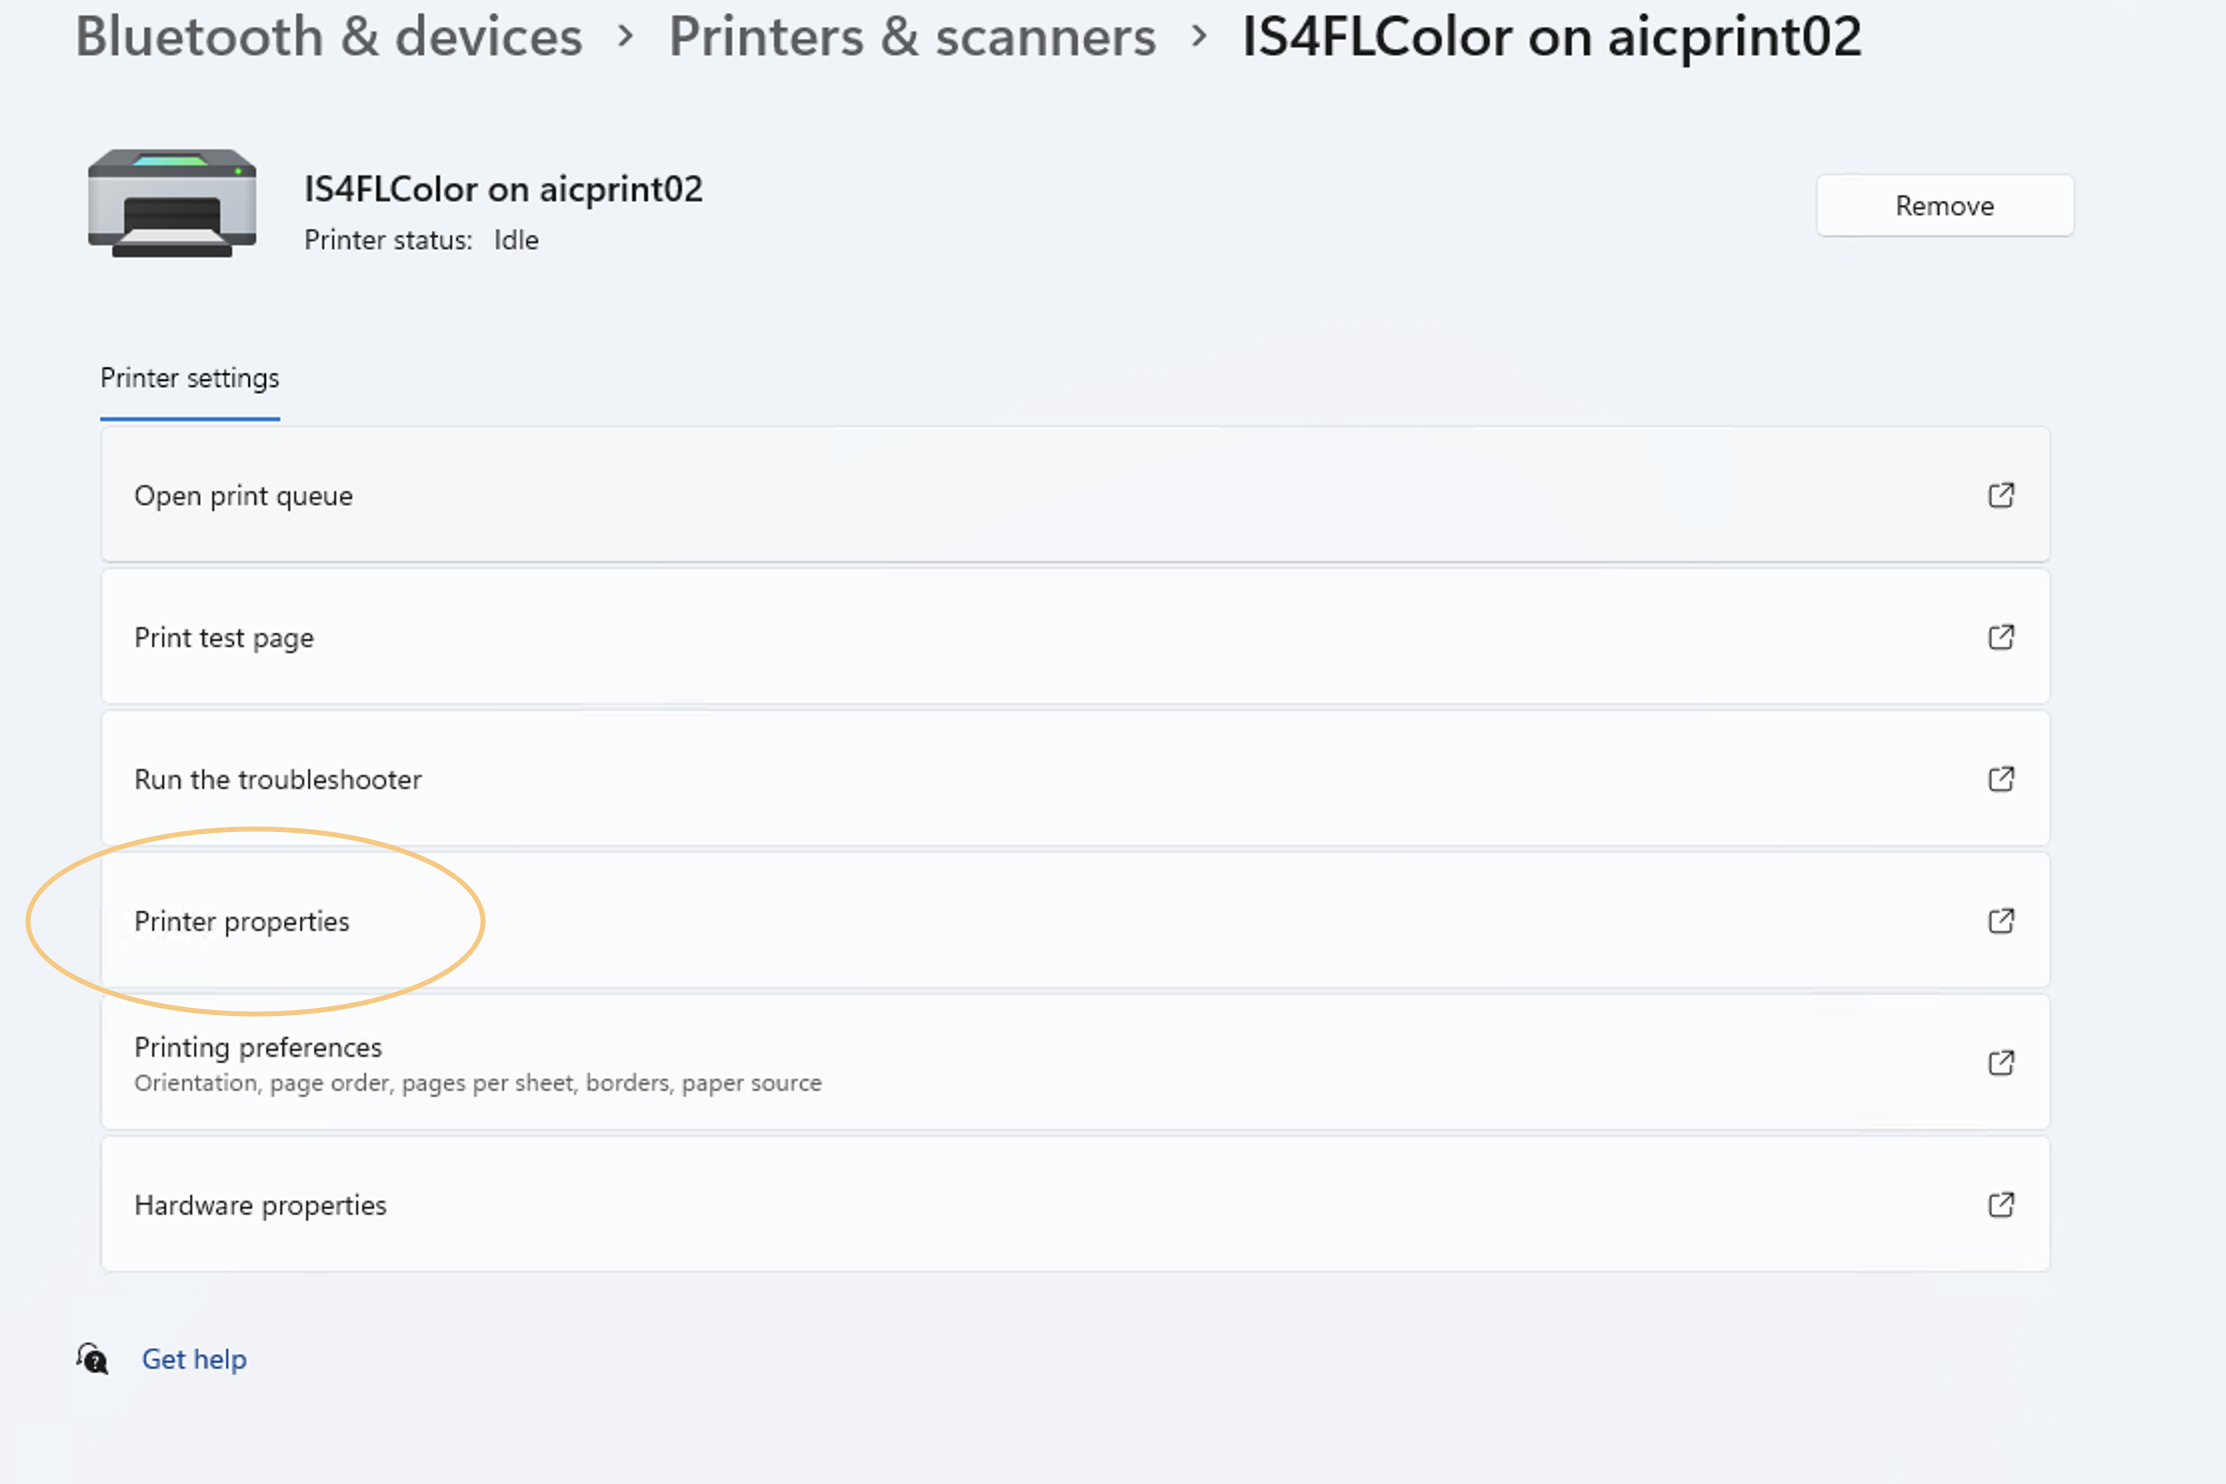
1. Open the printer folder.
2. Select desired printer.
3. Select "printer properties" option.
4. Click on "Device Settings" tab.
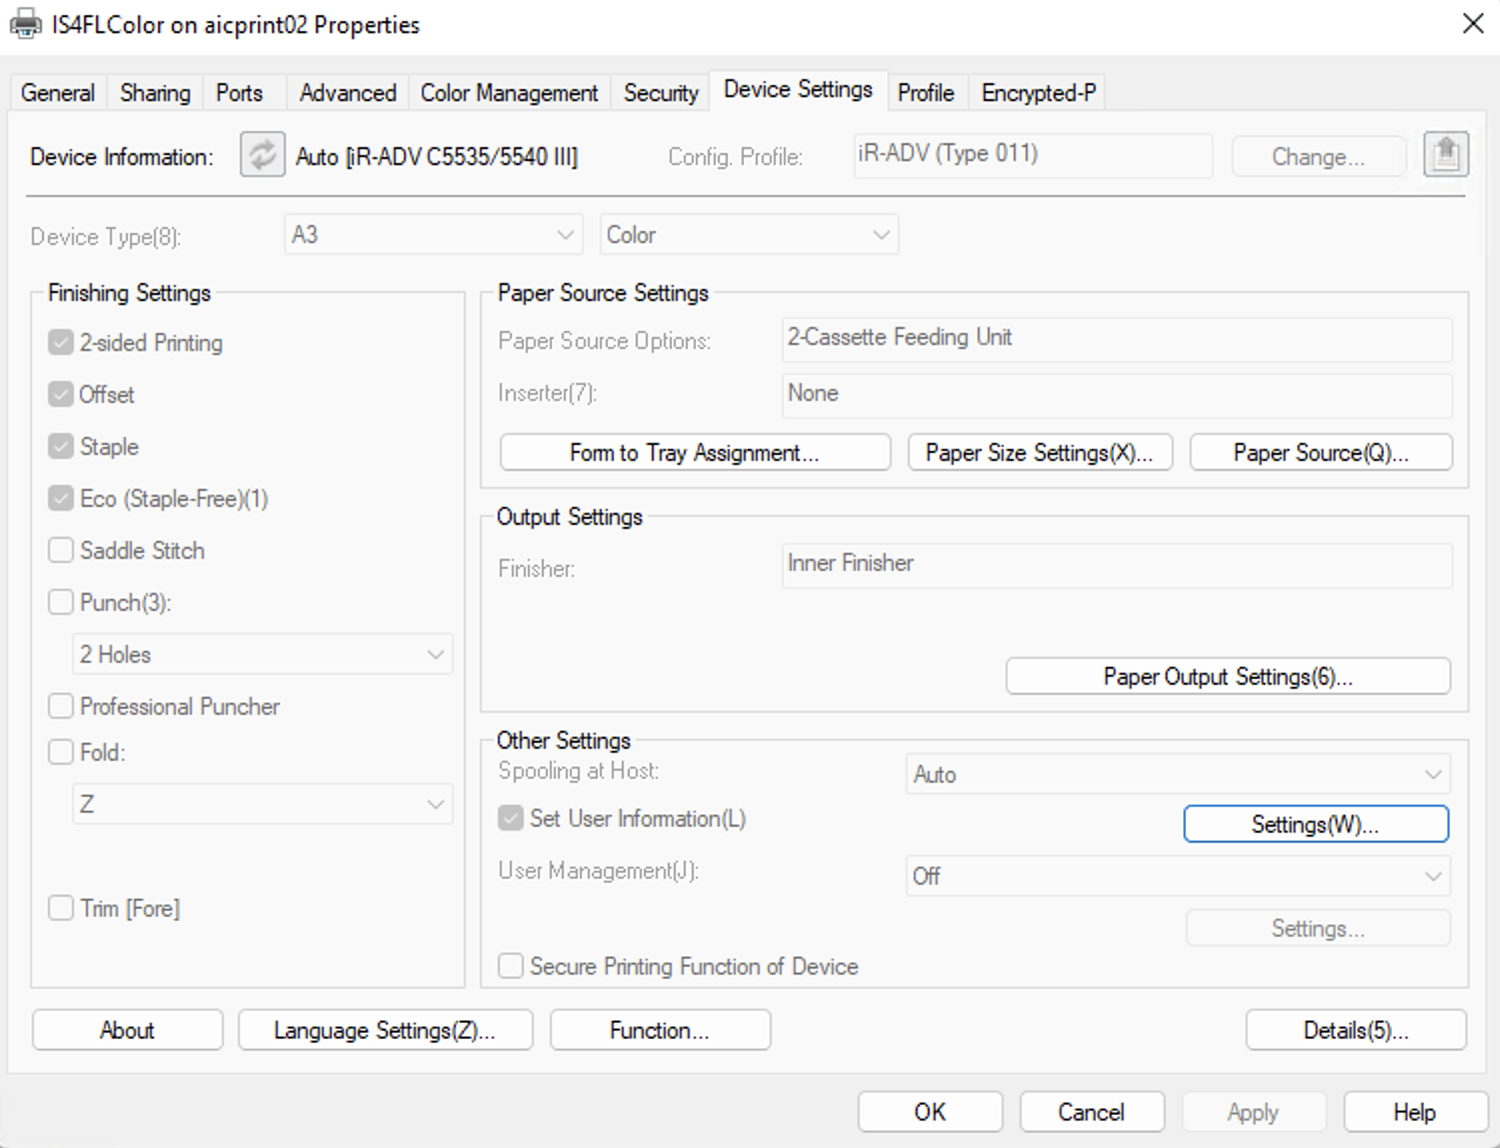
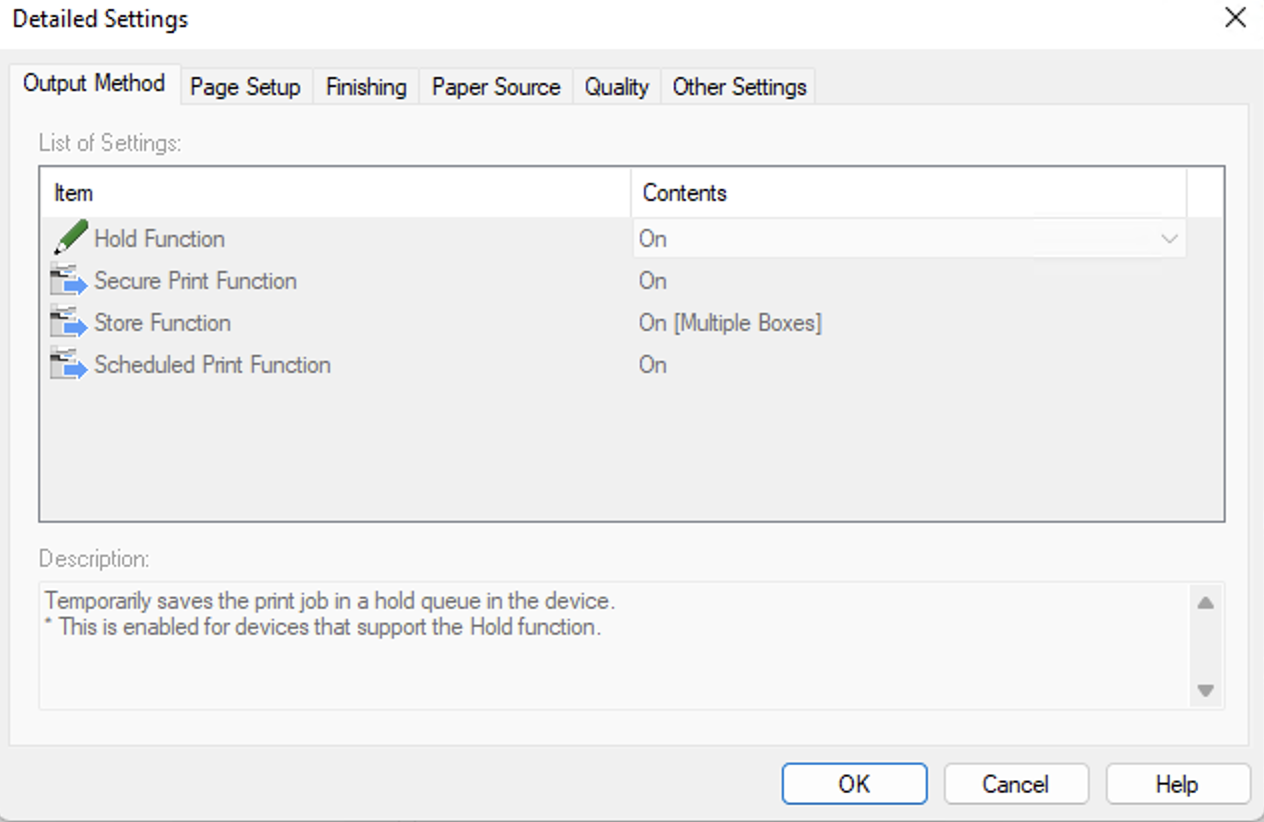
5. Click on "Details" tab and ensure that Secure Print is enabled.
Sending a secured print job to copier/printer.
1. Open print dialog box.
2. Select the correct printer and click "printer properties".
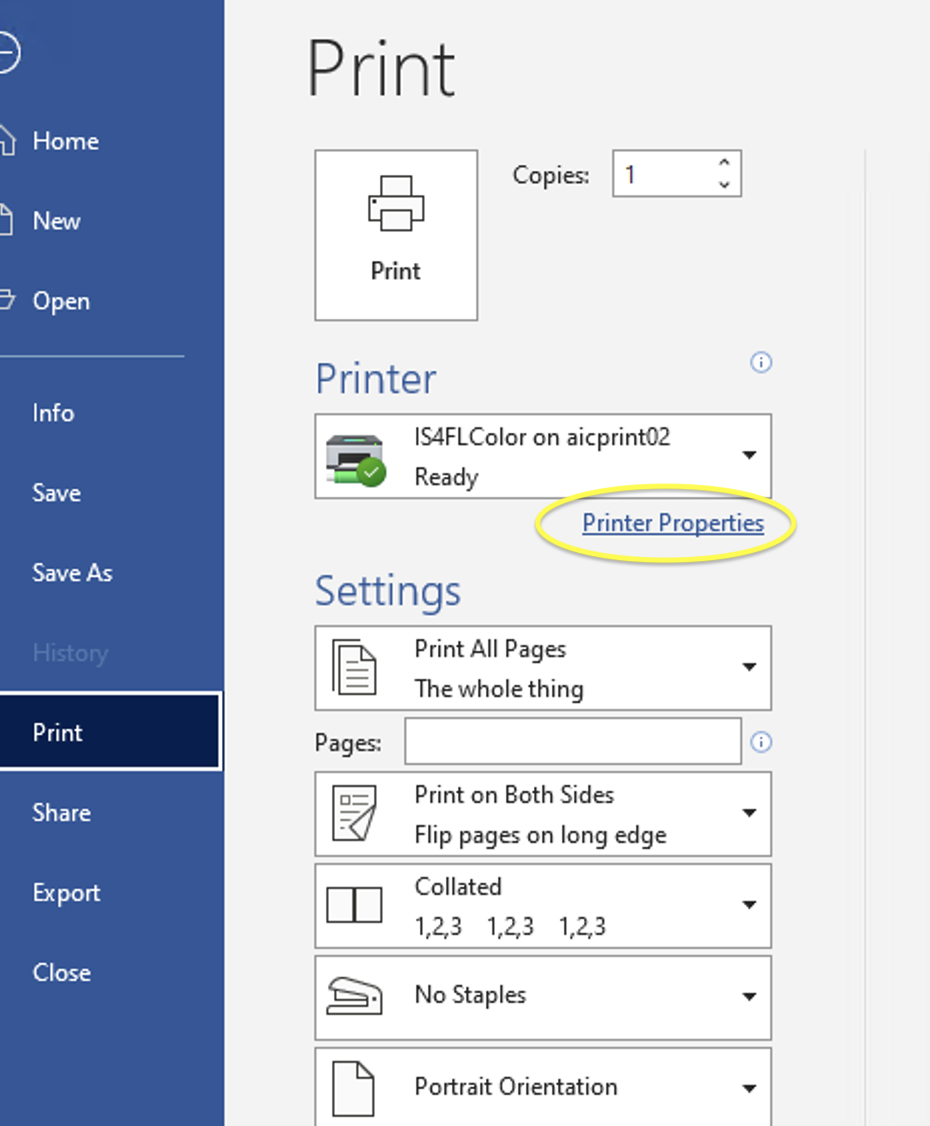
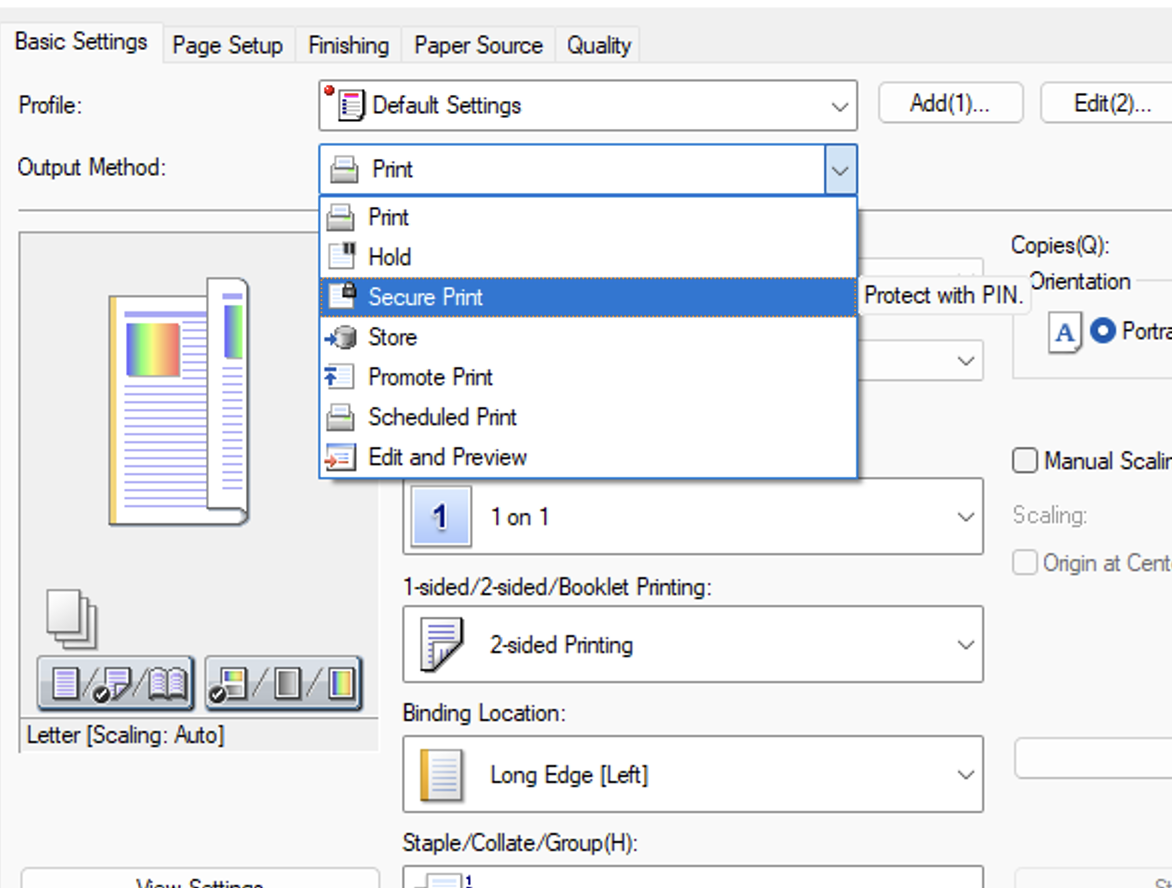
3. Under the "Output Method" option, select "Secure Print" from drop down.
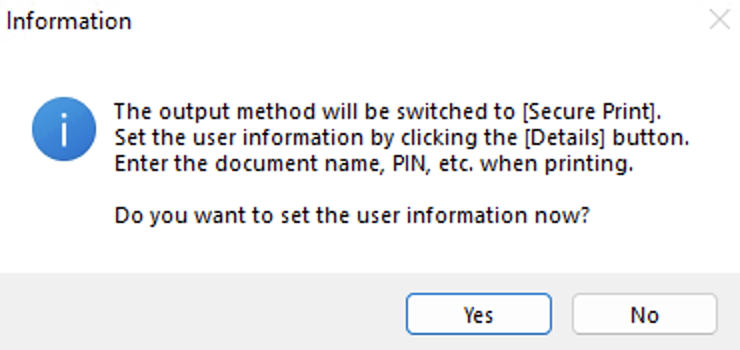
4. If you want to use the same user name and PIN every time, click [Yes]. To change the user name and PIN every time, click [No].
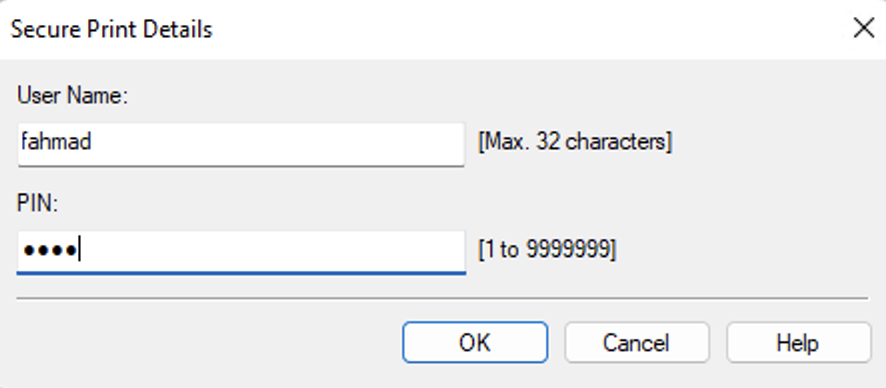
5. Enter user name, by default it will be your computer name. Choose a PIN (up to 7 characters) and click OK.
6. Click Print.
*Note: Secured documents that are sent to the machine are held in the memory for 30 minutes waiting to be printed.
Printing Out Secured Documents
1. Press Home button on machine.
2. Select "Print", locate your document from list.
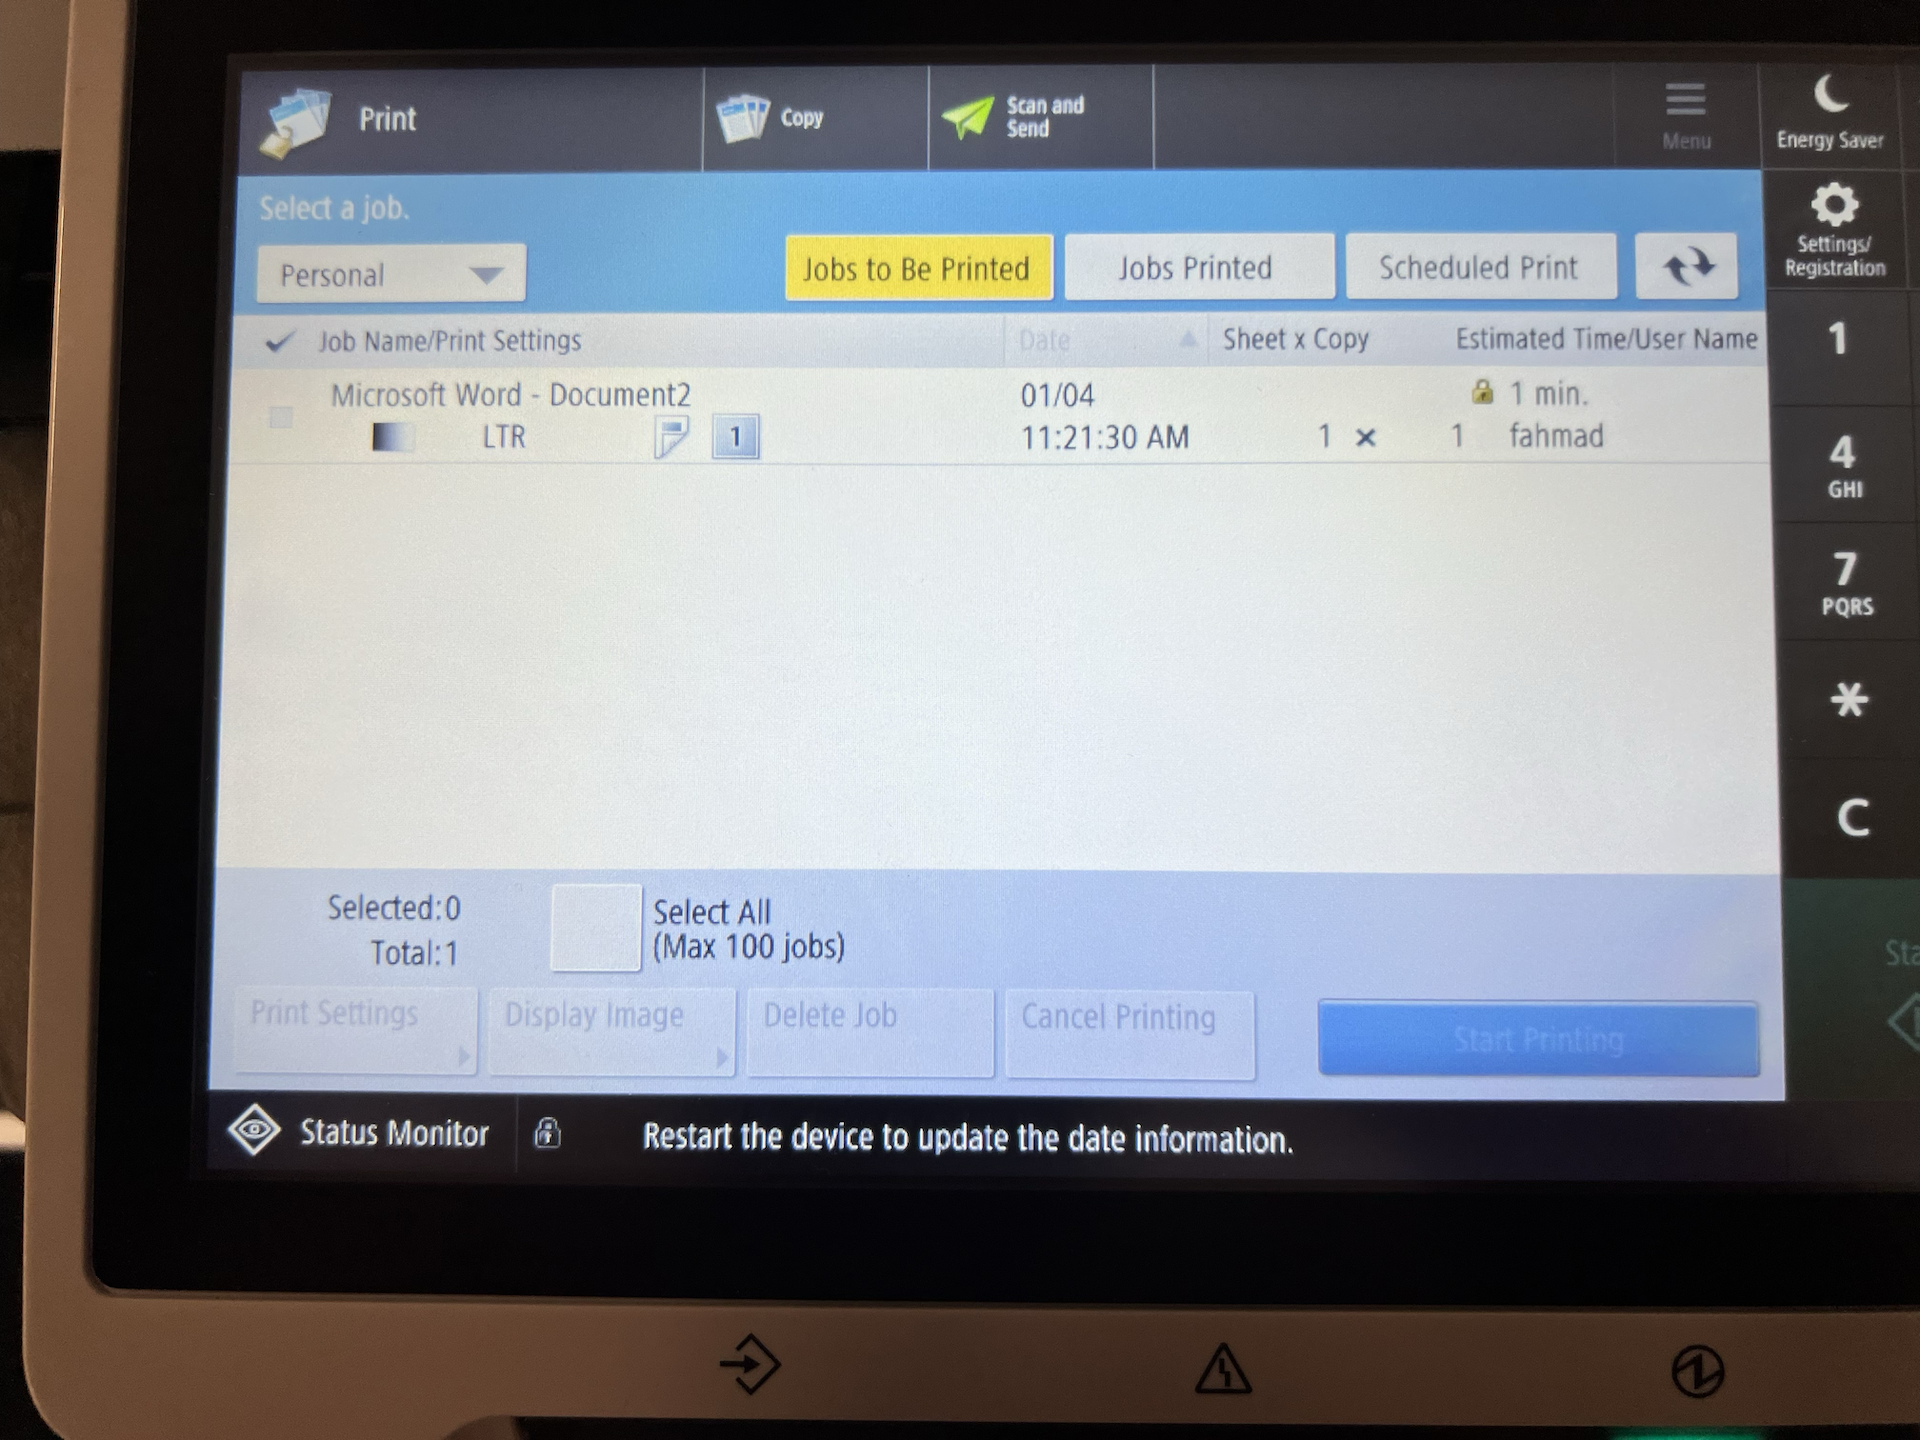
3. Select the document and enter PIN.
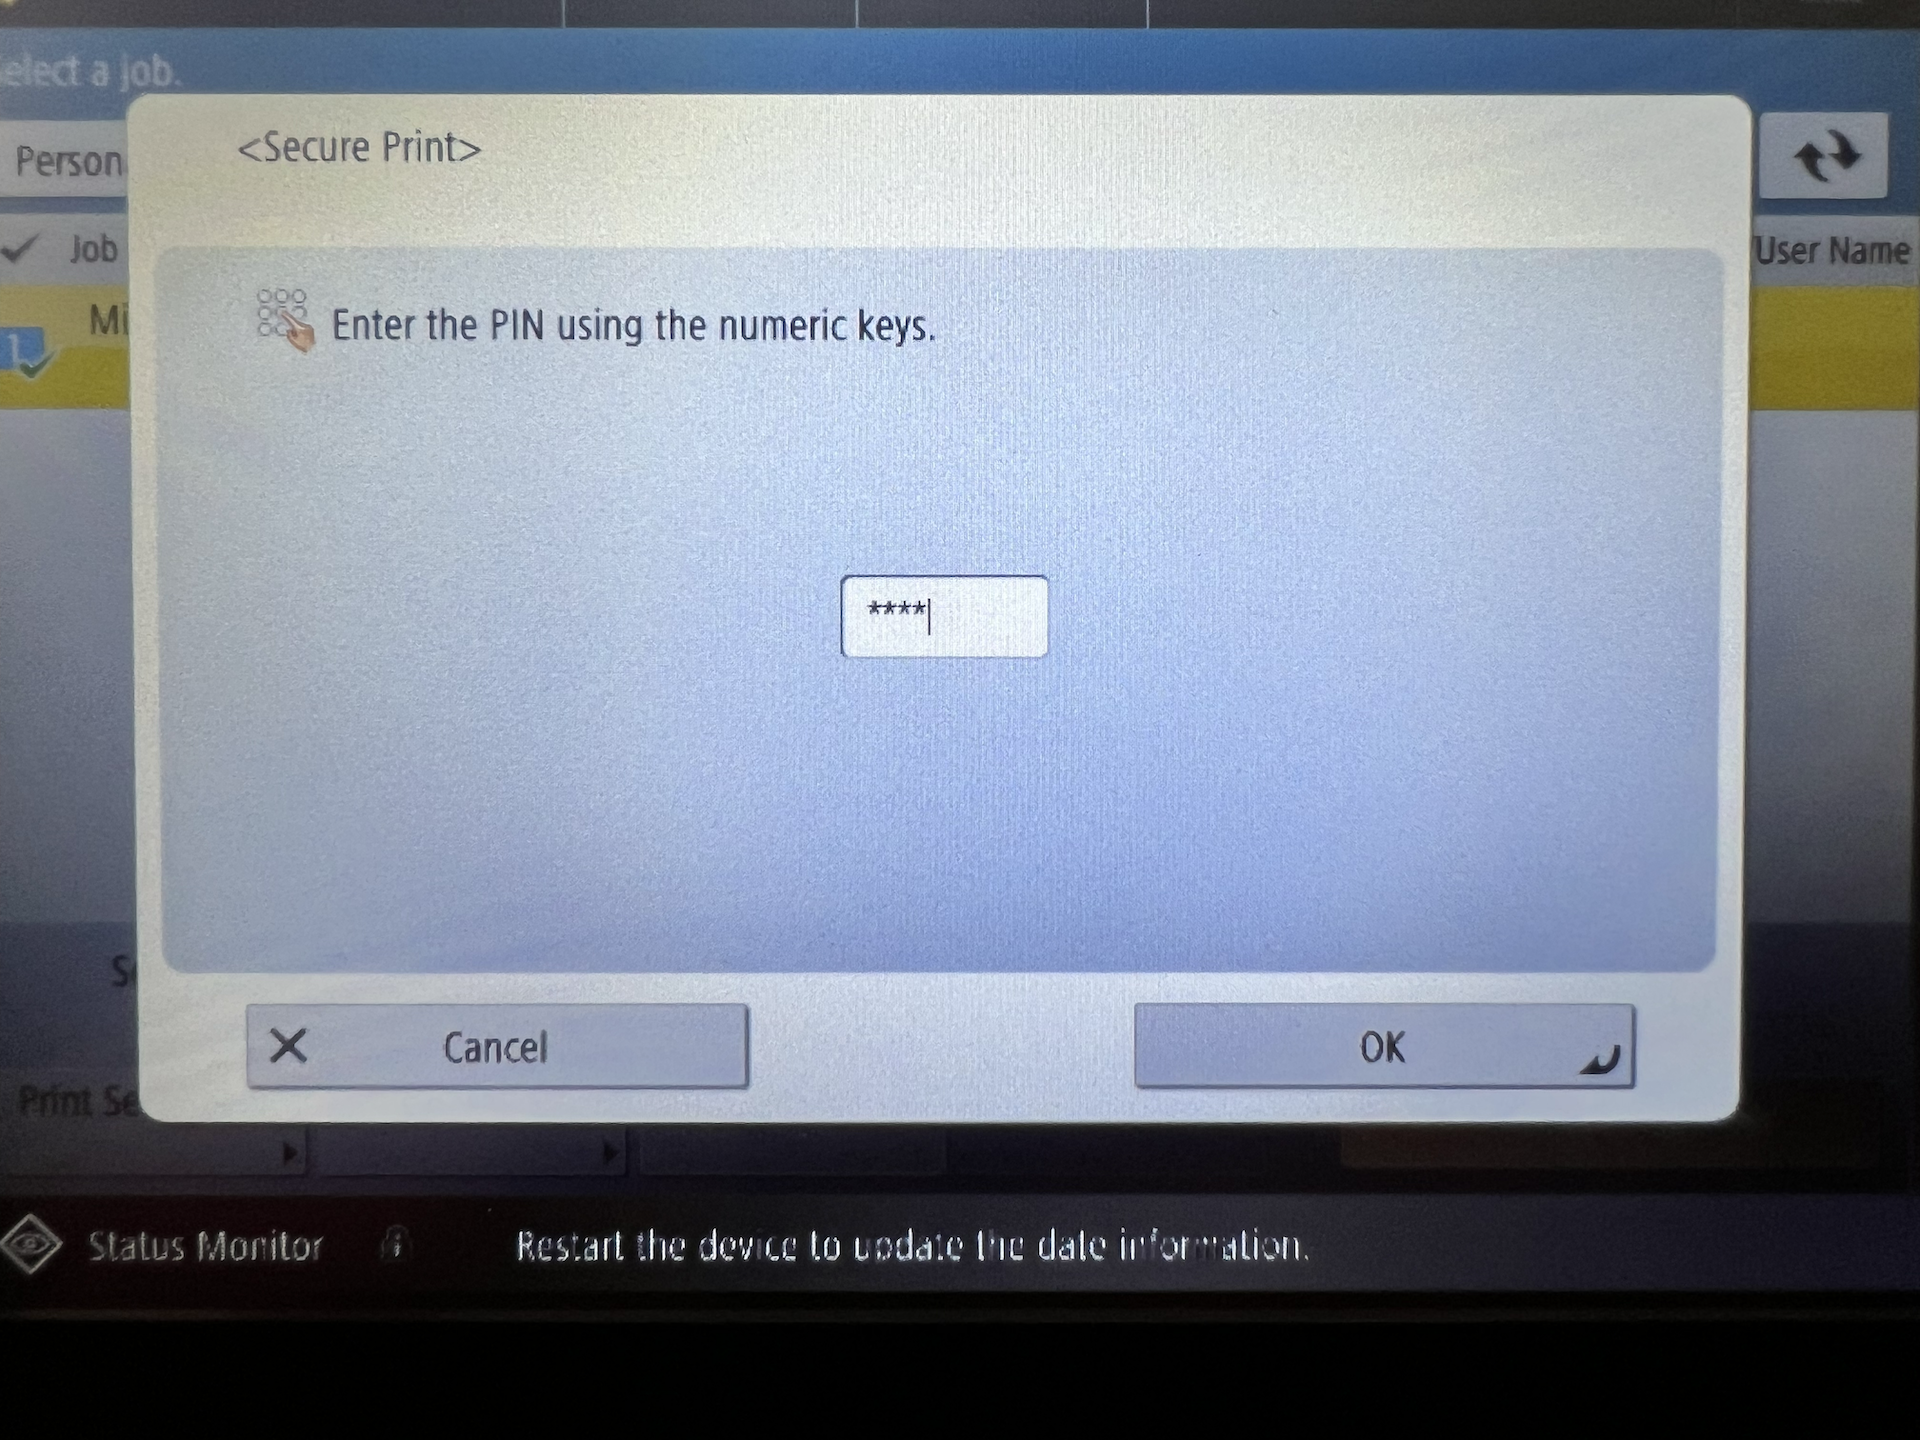
4. Click, OK and Print.